BUILD TUNE RACE RC YACHTS
The new optimised Alternative boat build
When I play golf, if I drive off the tee and lose my ball because of an errant swing, why is it that my second attempt is nearly always perfect making me wonder why didn't I swing like that on my first shot!
It's kind of like that when you build a second boat. The first attempt is full of small errors, air bubbles, lifted glass at the bow and stern, too much epoxy used, etc. The second boat has errors but it is much better and lighter.
I started the second boat yesterday afternoon and unwrapped it this morning and what a beauty she looks. If you are interested, here is what I did with a few pictures.
I started by repairing the old hull plug, patching up some damage when I cut the previous boat off the plug with a dremel. After a rub down and 5 coats of release wax it was good as new and ready for the layup.
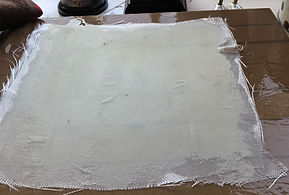
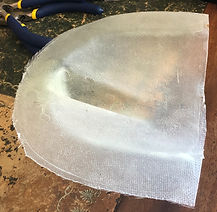
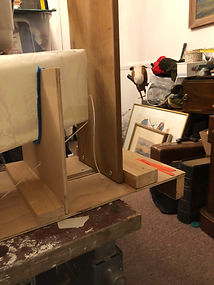
I cut out 3 sheets of 124gm S glass from a paper pattern I made earlier. I acquired 3 sheets of brown paper which were from a delivery of an old flower arrangement (my wife's!). With care, I cut the glass cloth straight onto the brown paper from the paper pattern I made earlier. The cloth was cut with no mess. In addition to the cutting, I drew a centre line with a felt pen and perpendicular lines (to the centreline) for the bow, stern and edge of the foredeck. This is done to allow easy alignment (when laying down the cloth onto the plug) with a centreline drawn down the keel of the hull along with a mark to indicate the foredeck. The brown paper not only seperated the 3 layers of cloth but also allows the cloth to be rolled up and carried as well as protecting the edges, keeping the cloth flat and clean. (Image 1)

Last summer on the first boat build, I cut the glass outside on a table, did not use any paper or protective cover and ended up with strands of glass fibre all over the patio!
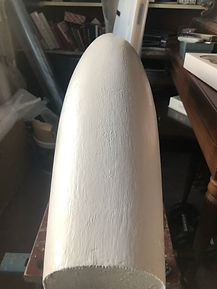
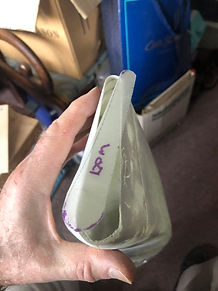
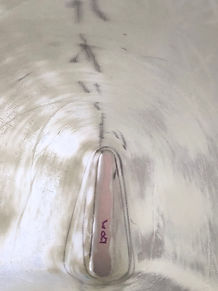
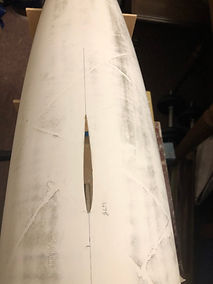
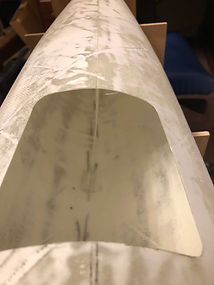
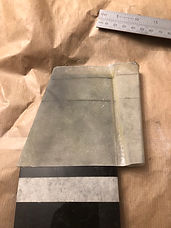
With the cloth prepared, I was ready to lay the hull up in the garden shed. Yesterday it was about 12 degrees which is just warm enough to work with epoxy. I needed a workbench to clamp the hull upside down (Image 4), a piece of wood hanging from the shed ceiling to screw the plug support post to work on the deck (Image 3), paper towel to wipe up mess, acetone for cleaning, nitril gloves to protect my hands, West System epoxy (slow cure), three plastic pots (I use fromage frais pots), a 2 inch paint brush and an aluminium roller for removing air bubbles, peel ply for wrapping the epoxy, screwdriver and electric drill for mounting and dismounting the plug. With all the bits together on site, I was ready to go. After mixing the epoxy using the self measuring plungers that you screw on the resin and hardener tins (3 pushes of the plunger will do one layer of glass) I applied resin to the hull side of the plug, being careful to wet the curves of the deck. The epoxy will not lie smooth on the wax and will pull back into globules looking a bit messy but it won't matter. Taking the first layer of cloth and with the boat mounted upside down on the workbench, hold it over the hull aligning the centreline, bow, stern and foredeck marks before laying the cloth down on the epoxied plug. (Image 2 3 and 4)


Gently smooth out the cloth with the paint brush and work out from the centre until the cloth is flat all over. This is quite fiddly but by taking time and being patient the cloth will lay out perfectly. Next step is to go over the cloth with the paint brush (be very gentle) and wetting the cloth where dry, removing air bubbles as you go. Use the epoxy sparingly as excess resin just adds weight. Finally go over the hull with the aluminium roller to get any missed air bubbles.
Now remove the plug from the workbench and screw to the bar dropping from the shed ceiling. Initially fix the hull upside down and then carefully allow the plug to rotate down while supporting the cloth over the deck, until the deck is level. (In my first build last summer, I picked the plug from the workbench after wetting the cloth on the hull, rotated it so the deck was uppermost, raised it up to the supporting bar and the glass cloth fell off onto the floor. You have been warned!)
Before you work the cloth into the deck with the paintbrush, cut away any excess. On the first layer I used a 1 inch overlap. On the second layer, I butt the ends of the cloth (ie no overlap) and on the third layer use an overlap again. In this way you avoid too much weight along the centreline of the deck. On my first boat I ended up with 6 layers of cloth on the centreline which produced a strong boat but heavy in the ends.
Work the cloth into the deck with the paint brush in the same way as the hull, until flat and smooth. Sorry there are no pictures of this as my gloves were coated in epoxy at the time!
Check over the hull and deck in good light to make sure there are no air bubbles and the cloth is tightly bonded at the bow and stern.
Leave the plug until the epoxy remaining in your mixing jug starts to go stringy. When this happens, the first layer of cloth will be stuck nicely to the plug and won't move when you apply the second layer. The longer you can leave it between layers the better. Half an hour should be long enough.
Wash your paint brush, gloves and roller in acetone and mix the second batch of epoxy. Bin the 1st mixing pot.
For the second layer, drape the cloth over the hull taking care with the alignment marks and brush out as before using just enough epoxy to wet the cloth.
Repeat for the third layer remembering to clean tools in between. I use four plunges of epoxy for the last layer because I wanted the outer layer slightly wetter. Any excess would be absorbed by the peel ply.
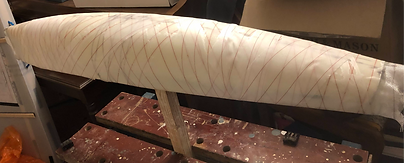
Finally wrap in peel ply. I used 10 metres of 100mm wide. Overkill I know but it did an amazing job even though the hull look a bit mummy like. (Image 5)
At the same time as laying up the hull, I made the components in Image 8. 9. 10. 14, 15 and 18. The fin box was Dave Creed's work.
A thin sheet for the bow stern and bulkheads
The mould for the deck layout above the fin box and final deck

Strip of S glass for bonding the deck

Reinforcement for the fordeck understanding the jib tack eyes

The radio pot and forward bulkhead

Paper template for forward bulkhead

I peeled the peel ply off this morning to discover a hull with no air bubbles, perfect adhesion at the bow, stern and foredeck.
In all the process took about 3 hours
All I need now are two coats of epoxy primer rubbed smooth and I am ready to pop the hull off the plug. Here is the rough finish prior to sanding
The finished hull popped off the mould safely in its supporting jig with the deck taped together to hold it secure


It all looks good and I know that the hull is useable so I can pay the second design fee and fit the boat out.
Having added two coats of epoxy primer, it is time to rub it all back to the surface of the S glass to make the hull as light and as smooth as possible. Up to two hours sanding. Joy! but the end result is worth the effort.
After painting on 250gms of High build epoxy primer, I sanded 200gms off on Saturday. The result is a very light smooth hull which you can see through.
The hull will remain in this condition until the deck has been finished and all the holes drilled. Then it is time for the vinyl wrap in metallic blue. Can't wait to see how it ends up when cut off the mould.
Once the hull is off the mould it goes straight into a support jig, with the frames cut from the design plan. This jig is marked and used for setting the fin position and rudder. (Image 7)
The foredeck and aft deck is bonded using 1 layer of 124gm s cloth (Image 13). The hull is strong and ready for the fin box, bulkhead and adjoining deck and radio pot to be bonded in.
On Sunday I cut all the access holes, (Image 33) and added two further layers of S glass around the fin box area in the hull, bonded the deck with an extra layer of S glass at the jib take off point and fitted the transom
I put small reinforcing plates in the deck at the stern and put 1 layer of S glass about 1 inch wide down the centre of the foredeck.
All up weight of the hull with all glass infrastructure but ex fitting will be around 400gms, considerably lighter than my first hull especially in the ends but heavier than the professional hulls. Having said that the hull is very strong, light in the ends and should be competitive.
Todays job is to fit the fin, bulkhead, deck moulding and radio pot and a post for the jib tack take off point. On course to finished hull by end of week.
A long day sealing the bow and stern, (Image 18 and 19) strengthening the foredeck, building an ultra light foredeck post (Image 14), cutting a slot in the hull (Image 21), measuring and shaping the forward bulkhead (Image 15 and 16) , fin case and deck. Lots of pictures below in a slightly random order.


Tomorrow I hope to bond in all the pieces and then the only other major jobs are to fit the plates for the servo and rudder stock which will likely be done on Wednesday. Then a final rub down and drill all the holes for the deck fittings. Finally after that I can wrap the boat in its metallic blue vinyl. Its an experiment but I am sure it will be worth the effort and if it doesn't work I can always paint it.
Fitting the fin
Yesterday was all about getting the fin box fitted. Alignment of the fin in exactly the right position with the design measurements and having it vertical is the most critical job on the boat. Get this wrong and the boat will be hard to balance and may sail higher on one tack that the other.
The boat in my jig is set up to be level on its water line, ie there is a horizontal line connection the bottom of the bow and bottom of the stern. The leading edge of the fin sits perpendicular to this line. Get the jig right and everything is easy. On the plan there are two measurements, one from the hull to the leading edge of the fin and then one from the tip of the bow to the bottom of the fin where it enters the bulb. Set these measurements and the fin leading edge should be perpendicular tp the waterline of the boat. I was less than a degree out. See image 24-27.
To get the fin exactly vertical looking from the stern, I level the boat at the shroud point and use a level on the fin to make vertical and then use masking tape to secure it. Gravity helps in picture 27.
The string in the picture is used to measure from the bow to the fin but I did have to make holes in the jig.
Tomorrow, I can fit the final pieces of the deck and the bulkhead.



Finishing the bonding
Yesterday was gluing day. Fitted the forward deck, pre drilled bulkhead, radio pot holder and mainsheet post.
Only one small error. I forgot to seal and reinforce the top of the fin box
I have the fiddliest job to do that today plus final fit for the servo mount and rudder stock mount. Nest jobs are to pre drill all the fitting holes, apply filler where required and final sand ready to apply wrap.
When fitting the mainsheet post, I accurately measured a centreline at the deck and then did the same with a string 6 inches off the deck. Then using a set square I was able to get the mainsheet post upright and aligned with the fin case, back stay, jib sheet eyes and jib attachment points which are all marked up. Fingers crossed the sails will set the same on both tacks.
Hull weight so far is 420gms. Old hull weight at this point 620gms. Maybe 350gms is achievable with a slightly thinner layup. I was generous with the epoxy at the base of the fin but this is where the correctors with be anyway. Estimate approx 400gms of correctors will be required.
Tidying up
Final bit of reinforcement went in yesterday. Not much to show as boat looks similar to day before but with addition of rudder stock and servo supports. Giving the hull a good t cut to look for any rough spots and then the metallic blue wrap
Little remaining jobs to do after the wrap like final fit of fin and add the electronics and fittings
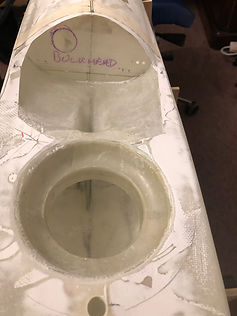
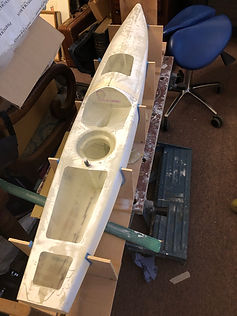


Finished the build
With the final jobs knocked off on Friday the hull is ready for wrapping. I spent today sanding and cleaning the hull and deck, final fit of the fin and rudder which ended up exactly according to the design plans and are both in line with each other. Tomorrow will be wrapping day.
Ordered the new PG tubes from Potters Solutions and a couple of bits and bobs from Sailsetc. Once the boat is wrapped I can set up the new rigs using existing fittings apart from the shrouds. Then a bit of in house tuning and I am ready to get on the water.
Its not a wrap
The wrap failed. There is so much curvature in the hull and deck, you need to stretch the wrap so much before application and you need several pairs of hands, so it's back to the paint spraying.
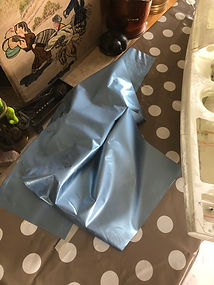
The boat is finished bar the spray and as Mr Gibson said you are far better off with paint as damaged vinyl is impossible to repair. He should know he used to wrap 18 footers amongst other things. Why didn't I speak to him first.
The dream was there, the experience was missing. Loved the metallic finish but it is not to be.
Onwards and upwards and off to watch the 18 footers race round Sydney harbour in the JJ Giltinan. On the computer of course
Decision time on paint
It has been a long process trying to sort the paint for the boat. I could use my tried and tested 2 pack polyurethane which I know is hard durable and the right solution, but I do want to spray to keep the decks looking smart. As you know I tried using vinyl wrap but the curves of the boat proved too much.
The search took me to spray cans of epoxy, enamel and other finishes but I came across an industrial acrylic based paint in a spray can. It is designed for repair of industrial coatings indoor or external. Its a risk I know but I prepared a sample this afternoon and it has great colour, is hard, flexible, great UV properties and resistant to scratches. The date sheet is here:
http://www.farnell.com/datasheets/3165638.pdf
So on it goes tomorrow and we will see how the paint performs. The pictures below show the new spray look on a sample and the effect I am trying to avoid when painting 2 pack Polyurethane. I will show you the result tomorrow and then see how it wears when we get sailing.
Problems with the battery
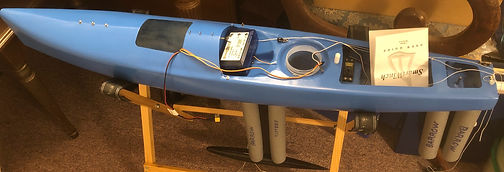
The hull fit out is complete with keel and rudder fitted in perfect alignment. When I went to test the electronics I started charging the battery and immediately noticed it was swelling. I removed the battery outside as there are interesting stories about batteries blowing up. Two more on order. Progress is halted until new `PG spars and batteries arrive next week.
Be warned, keep an eye on your Lipo/lifo battery if you have not charged them for a while. If they show signs of expansion, get them out of the house.
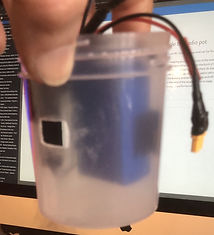
Inside the radio pot
I read an article by Darren Paulic posted on Facebook RC Sailing Group and can be found here. Radio control sailing in salt water.
In the article Darren talked about the importance of keeping your electrics out of the water and covering with Vaseline or silicon grease. He put a layer of neoprene on the base of his battery and receiver to keep them off the bottom of the radio pot to protect them from any water ingress. I thought a step further for a simple neat solution and found you can use sticky back velcro which sticks like you know what, even to Correx, to keep the battery and servo components separate and off the bottom of the pot. You can also put a tiny piece on the end of the receiver wires to keep them at 90 degrees to each other for optimum radio signal performance. Remember to position the battery on the centreline of the boat. Image 38 and 39.
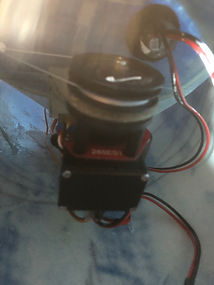
Problems with the winch, or was it operator error (Image 40)
First of all a great shout out to Bill Green (RMG UK) who provides a super service and is so quick to respond to queries. When I disassembled and re assembled my radio gear transferring to the new boat, I could not work out why when I turned my transmitter on the winch moved by over a turn. Turn the transmitter off and it returned to its original position. A call to Bill should resolve the problem. He rightly said I should program the winch limits as per the manual which I had not dome previously and see what happens. I did that but it did not fix the problem.
Duh, I eventually remembered. On an Emsworth training zoom, their man Richard Ballas who is a radio whizz had talked out setting up failsafe mode on the transmitter. This allows you to set the rudder and the sheet on the boat so it will go round in circles rather than sail off into the distance if the boat loses radio signal. I had set this up a few weeks ago but had forgotten what it would do. Every time I turned the transmitter off, the sheet was eased a turn and a half and the rudder turned 25 degrees. Turn the transmitter on and the sheet and rudder return to their original position. Problem solved, now all I have to do is fine tune the winch setting when fully rigged.
Currents weights so far:
Bare hull painted 460gms
Fittings and RC 373gms
Rudder 32gms
Bulb and fin 2500gms
Rig estimate 235 to 300gms
Therefore estimate 365 to 400 gms of correctors.
Here is the finished boat in all its glory and a few random photos of the radio pot and winch.

